Stucco Siding Installation in Farmington, Connecticut
Stucco Siding Installation in Farmington, Connecticut gives homeowners a durable exterior finish when aging siding, drafts, or water entry call for a complete upgrade. We assess the wall assembly, explain the finish options, and plan stucco siding fitting Farmington around your home's openings, trim, and drainage details. If you are renovating, replacing failing cladding, or finishing a new addition, we help you choose a system suited to the structure and local weather.
Measure elevationsCheck openings, corners, and transitions
Protect walkwaysCover nearby surfaces before setup
Check wall layersReview substrate before covering
Review finishWalk through completed details together
What Stucco Installation Covers
A standard installation includes a site review, surface preparation, weather-resistive layers, planned flashing and joints, stucco application, and cleanup. We identify substrate damage and opening details before work begins. Extensive framing repairs, window replacement, decorative trim changes, or unrelated roof work are separate tasks; we explain those needs before they are added to the project.
Wall Condition Review
We inspect the existing cladding, sheathing, openings, and visible moisture concerns before covering the wall. You learn where the surface is sound, where repairs are needed, and how the proposed system will meet existing trim or adjacent siding.
Surface Preparation
We remove the materials identified for replacement, protect nearby areas, and prepare a stable substrate. Damaged sheathing is addressed as agreed, and the wall is made ready for the specified weather-resistive layers and stucco components.
Flashing Coordination
We detail transitions around doors, windows, corners, and penetrations so water drains outward. The work includes reviewing existing flashing and installing compatible details where the assembly requires them, rather than relying on surface caulk alone.
Stucco Application
We apply the selected stucco system in its specified sequence, with planned joints and finish texture. Application timing follows product requirements and actual site conditions, including temperature and moisture that affect curing.
Final Walkthrough
We review completed walls, edges, joints, and cleanup with you. You receive care guidance for routine inspection and cleaning, along with notes on any areas that need continued observation after the finish has cured.
Homes and businesses.
The approach is the same for a home and a business. What changes is the access, the schedule and who needs the paperwork.
Home Projects
We plan around your household access, landscaping, and the elevations being worked on. You will know which areas need temporary clearance and what the daily sequence involves.
Cracks near windows
Stucco on a new addition
Mixed siding transitions
Business Properties
We coordinate access, staging, and work areas with property owners and managers. Clear sequencing helps keep entrances usable and makes wall sections easier to review.
Exterior renovation phases
Window and stucco coordination
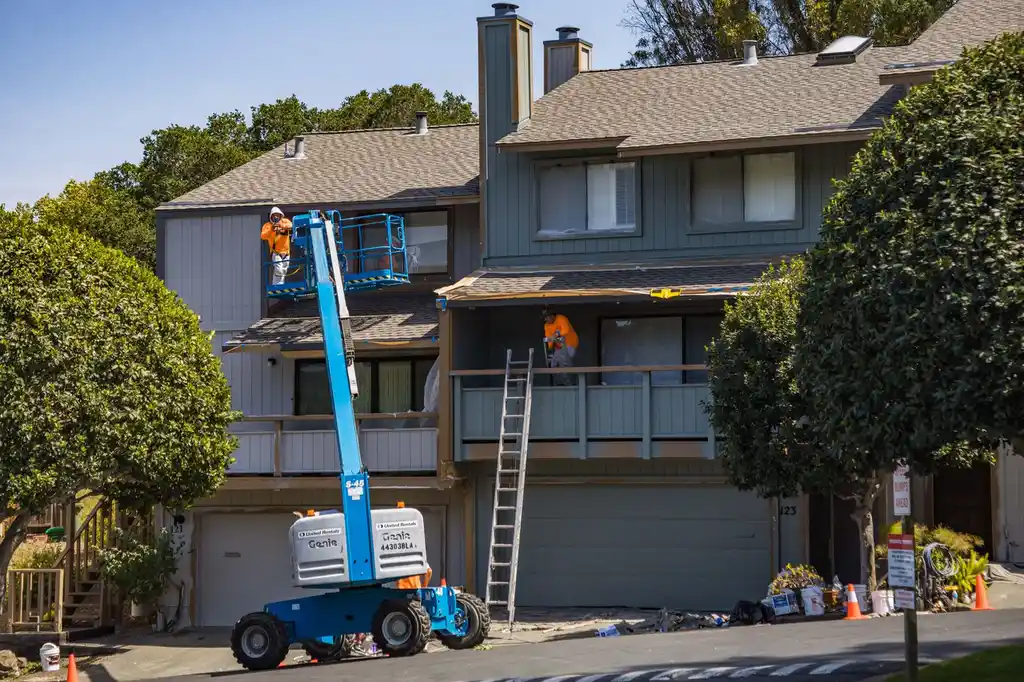
Elevated wall access
Stucco Siding Installation in Farmington
A plain-language look at what Stucco Siding Installation involves and when it is needed.
Stucco Siding Installation in Farmington, Connecticut is an exterior cladding service that builds a layered, finished wall surface to protect a home from weather and improve its appearance. We inspect the sheathing and existing wall, correct damaged areas, and install the specified drainage and weather-resistive layers before applying the stucco system. Proper flashing at windows, doors, corners, and roof intersections matters as much as the finish coat. We also plan control joints and transitions so the wall can accommodate movement without concentrating stress around openings.
Farmington's freeze-thaw cycles, wind-driven rain, and humid summers make water management essential. Older homes in the Farmington Historic District and houses with mixed siding materials need careful transitions where stucco meets wood siding, soffit, or window frames. Our team checks for siding rot, stucco cracking, and signs of water infiltration before recommending work. For homeowners comparing affordable Stucco Siding Installation in Farmington Connecticut, we explain which repairs protect the assembly and which cosmetic choices can be adjusted.
Stucco lasts as a wall system when drainage, flashing, substrate, and finish are planned together.
What it is
A layered exterior cladding system finished with stucco over a prepared, water-managed wall.
When needed
When deteriorated siding, a renovation, or a new addition calls for a durable exterior finish.
What to expect
Wall review, preparation, flashing, stucco application, curing, and a final walkthrough.
What to Expect During Installation
Stucco siding work in Farmington moves through inspection, preparation, application, and final review. Your schedule depends on wall area, substrate condition, system requirements, and curing weather; we explain the sequence before setup and keep access routes clear.
Inspect and Measure
We walk the exterior with you, measure each elevation, and note windows, doors, trim, roof intersections, and existing cracks. A tape measure and level help verify dimensions and transitions. We look for soft sheathing, siding rot, and failed sealant, then identify areas that need repair before cladding begins. The visit usually takes one to two hours for a typical house.
Measure walls
Inspect openings
Note repairs
Prepare the Wall
Our crew removes the agreed cladding and protects nearby doors, landscaping, and paths. We replace damaged sheathing where required, install or repair the water-resistive layer, and fit flashing at penetrations. A circular saw and utility knife are used for controlled cuts; dust and debris are collected as the wall is opened. Preparation often takes one or more workdays.
Remove cladding
Prepare substrate
Protect areas
Set Drainage Details
We establish the drainage plane, termination points, control joints, and clearances before applying finish materials. The crew checks each opening so flashing laps direct water outward, not behind the assembly. This is the stage where small errors become expensive, so we pause to verify transitions at window frames, corners, and the foundation line.
Set drainage
Fit flashing
Plan joints
Apply Stucco Layers
We install the specified stucco system in its required sequence, maintaining consistent coverage and planned joint locations. Application and curing time vary with the system, wall size, and temperature; cold nights and damp conditions affect the schedule. Scaffolding and a safety harness provide stable access where elevations require them, while the crew protects adjacent finishes.
Apply layers
Check conditions
Allow curing
Review and Clean Up
After the finish has set, we inspect corners, openings, joints, and visible transitions with you. We remove masking, collect debris, and note any care instructions for the selected finish. You receive a walkthrough of the completed areas and practical guidance on checking the walls after heavy rain or the first seasonal temperature swings.
Review finish
Clear debris
Explain care
Tools and Installation Methods
Move across a circle, or focus it and press Enter, for an illustrative thermal view of the photograph.
Tape measure and level
We verify wall dimensions, opening locations, and straight reference lines before layout. Accurate measurements help keep joints and trim transitions aligned across each elevation.
Circular saw
We use controlled cuts when removing cladding or preparing sheathing, keeping the work limited to the planned area and reducing unnecessary disturbance to sound materials.
Utility knife
A utility knife trims house wrap and flexible flashing for clean overlaps around openings. Correct cuts support continuous water-resistive layers at corners and penetrations.
Scaffolding and safety harness
For elevated walls, scaffolding provides a stable work platform and a safety harness supports fall protection where the setup calls for it. Proper access helps the crew maintain consistent application.
Caulking gun
We apply compatible sealant at designated movement joints and transitions, not as a substitute for flashing. A controlled bead supports a neat, serviceable edge around selected details.
Thermal views are illustrative, generated from the photographs.
Methods
Drainage-plane detailing
We arrange the weather-resistive layer and flashing so incidental water moves down and out of the wall. Each layer overlaps in the direction of drainage, especially at windows, doors, and roof intersections. Before the stucco hides these details, we check the connections and confirm the planned termination points.
Opening-first sequencing
Window and door details are resolved before surrounding stucco is applied. We inspect the frames, install or correct flashing, and coordinate sealant locations with the system. This approach keeps critical connections accessible during installation and reduces the risk of cutting into completed finish to correct an opening.
Joint and movement layout
We plan control joints, corners, and changes in wall plane before application. Joint placement follows the selected system requirements and the geometry of the elevation, rather than being improvised after the finish begins. This gives movement a designed path and helps limit stress at openings and long wall runs.
Weather-aware application
We follow the product's application and curing instructions while checking actual temperature, wind, and moisture conditions. Cold nights, rain, or direct sun can affect the work sequence, so we protect the wall and adjust timing when required. The goal is a properly cured finish, not a rushed handoff.
When Stucco Makes Sense
Front wall
A Farmington homeowner is replacing faded siding and wants a continuous finish across the front elevation.
We inspect the existing wall, check window and door transitions, and review how the new finish will meet the remaining cladding. After confirming the substrate and drainage details, we prepare the elevation and apply the specified stucco system in sequence.
Outcome: The front wall gains a consistent appearance, while planned joints and flashing preserve the important weather-management details at openings and edges.
Home addition
An addition in Farmington Meadows needs an exterior finish that connects cleanly with the original house.
We assess the addition's sheathing, roofline, and window placement, then plan the stucco-to-existing-siding transition. Our crew aligns trim and joint locations with the older structure and checks that the new wall can drain independently without directing water behind the original cladding.
Outcome: The addition looks integrated with the home, and the junction between old and new materials is planned rather than concealed.
Historic details
A Farmington Historic District renovation has mixed materials and aging details around original windows.
We document existing trim and frame conditions, identify which elements will remain, and coordinate the new wall finish around them. Where an opening needs repair, we address flashing and sealant before applying stucco. We preserve sound details and clearly identify any changes needed for a reliable wall assembly.
Outcome: The exterior keeps its established character while vulnerable transitions receive a deliberate weather-management plan.
Cracked finish
A property owner is replacing cracked stucco after recurring damp spots appeared inside one room.
We inspect both the visible finish and the affected wall area, looking for failed joints, flashing defects, and wet sheathing. After correcting the source and preparing a stable substrate, we apply the selected replacement system and review the repaired area with you.
Outcome: The wall receives a renewed finish and a corrected water path, reducing the chance that a surface-only patch will fail again.
Farmington homes face a broad seasonal range: freezing winter nights, spring rain, humid summer weather, and rapid temperature swings in fall. Those conditions put extra importance on sound flashing and drainage behind the stucco. We inspect roof edges, window frames, and foundation clearances because water often enters at transitions rather than through the center of an intact wall.
In older neighborhoods, additions and renovations can leave a mix of wood siding, masonry, and replacement windows that require different connection details. Our stucco siding fitting Farmington process accounts for those materials before finish work begins.
Application conditions also matter: many cement-based systems require temperatures above 40 degrees Fahrenheit during application and curing, but the selected product's instructions govern. For new stucco siding installation near me Farmington, we review access, wall exposure, and the forecast with you, then sequence preparation and finish work to suit the site.
Farmington Historic District: Older trim and changing wall materials call for measured transitions. We inspect retained window frames and edges before deciding where new stucco should terminate.
Downtown Farmington: Compact lots and pedestrian access can affect staging. We plan material handling and protect paths while keeping the work area organized.
Farmington Woods: Homes with varied elevations need safe access planning. We check where scaffolding is required and protect landscaping beneath upper wall sections.
West Farmington: Renovated homes may combine newer windows with older cladding. We coordinate flashing and stucco edges so each part of the wall can drain.
Freeze-thaw cycles stress cracks and exposed wall transitions: Water that enters a small opening can freeze and expand, worsening the defect. We inspect joints and flashing before installation and schedule curing around the system's temperature requirements.
Wind-driven rain tests window and roofline details: Rain can move sideways into weak head flashing, corners, or poorly sealed penetrations. We trace likely water paths and detail those transitions before the stucco finish covers them.
Walk the elevations and explain visible wall conditions.
Review access needs and protect nearby work areas.
Check completed details and discuss maintenance.
From problem to finished result.
IllustrativeThe thermal view is generated from the photograph. It is not a measurement. Drag the handle, or use the arrow keys once it is focused.
Cracked Front Elevation Renewed
Before: The front wall had several hairline cracks near the windows and a patchy finish from previous repairs. The homeowner also noticed a damp mark indoors after heavy rain. We inspected the wall, checked the openings, and found that the finish alone was not the only concern; flashing and the underlying substrate needed attention.
After: We corrected the opening details, prepared the substrate, and installed a new stucco finish across the 420-square-foot elevation. The planned joints and clean window transitions created a consistent surface, while the wall's drainage path was addressed before the finish went on. The owner received a walkthrough and inspection guidance.
Check the wall each spring and fall, especially around window corners and joints. Keep soil clear of the bottom edge, and report cracks that widen or return after repair.
Addition Tied Into Existing Home
Before: A new 300-square-foot addition met older lap siding at an exposed corner. The junction looked unfinished, and runoff from the roofline reached the wall edge. The owners wanted a stucco finish but needed the connection to the existing exterior handled without trapping moisture.
After: We installed the specified stucco system on the addition and detailed the transition with flashing and compatible trim. The new wall gained a defined joint at the material change, and the roofline runoff was directed away from the junction. The visual connection now looks intentional rather than like an unfinished patch.
Keep gutters clear and inspect the material-change joint after major storms. Check sealant at designated edges annually and arrange repair if it separates or cracks.
Water-Damaged Wall Rebuilt
Before: A rear wall showed bubbling paint indoors and a soft exterior section below a window. The existing cladding concealed water-damaged sheathing, so simply applying a new finish would have left an unstable base. We opened the affected area to identify the full extent of the damage.
After: We replaced 48 square feet of damaged sheathing, restored the weather-resistive layer, corrected the window flashing, and applied the stucco finish. The repaired wall had a firm substrate and a continuous drainage detail at the opening. The homeowner could see each concealed repair before the area was closed.
Watch the interior wall below the window after wind-driven rain and keep the sill area clear. If staining returns, arrange an inspection rather than painting over it.
Fixing Common Farmington Stucco Issues
Cracks, damp patches, and failing edges can indicate more than a surface flaw. We check the wall assembly before recommending a repair or replacement, then address the source of the problem so the finished exterior is not simply covering damage.
CrackingHairline cracks spreading near corners and window openingsWater can enter through open cracks, stain interior finishes, and reach sheathing or framing. Repeated movement can also make a cosmetic patch fail again. We map the crack pattern, inspect nearby flashing and joints, and check for moisture or movement before selecting a repair. If the wall needs new cladding, we establish control joints and opening details as part of the installation. That approach helps avoid treating a symptom while leaving its cause behind.
Soft sheathingSoft sheathing concealed behind older claddingInstalling a new finish over deteriorated sheathing leaves the wall unstable and can trap moisture. Fasteners and system layers also need a sound base. We open the affected area and examine the substrate before closing the wall. Damaged sections are repaired as part of the agreed work, and the weather-resistive layers are reconnected. You see what was found and how the wall is being prepared before stucco covers it.
Window leaksWater staining below windows after wind-driven rainFailed head or sill details can send water behind the exterior, causing concealed decay and interior staining. Repeated wetting can affect nearby trim and wall framing. We trace the water path around the frame, inspect flashing and sealant, and correct the opening detail before applying the finish. Where window work is also needed, we coordinate it with the stucco sequence. This makes the repair address drainage rather than relying on another bead of caulk.
Uneven patchesUneven repairs that do not match existing finish textureA patch can remain visible and may not bond properly if loose material or underlying movement is left in place. The mismatch can grow as the surrounding wall weathers. We assess the finish, remove unstable material where required, and select a compatible repair approach. For broader deterioration, we discuss replacing a defined wall section so the texture and joint layout can be planned consistently. We explain likely visual differences before work starts.
Practical Benefits for Your Home
A well-detailed stucco wall sheds water and gives your home a durable finished surface.
Continuous Exterior Finish
Stucco creates a broad, unified surface across wall sections, helping update a dated exterior without repeating visible lap lines. We map corners, openings, and control joints before installation, so the finished pattern looks intentional. The result is especially useful when you want one consistent appearance across an addition and the original Farmington home.
Managed Water Path
The cladding is only one part of a dry wall. We detail house wrap, flashing, and drainage paths so incidental moisture can move out instead of collecting behind the finish. At windows and doors, careful sequencing reduces the risk of water infiltration and protects framing from concealed damage.
More Choice in Finish
Texture and color can be selected to complement brick, stone, cedar siding, or painted trim. Before work starts, we review sample appearance and how changes in light affect the wall. This makes stucco siding fitting Farmington a practical option for homeowners who want a tailored exterior rather than a standard panel profile.
Fewer Routine Washes
Stucco does not need frequent repainting like some wood finishes, although it still needs periodic inspection and gentle cleaning. A visual check each spring and fall helps you spot hairline cracks, failed sealant, or damaged flashing early. We explain what deserves prompt attention and what can be monitored.
What a written scope covers.
What a written scope covers and what shapes it. Prices are set by the business after the first look.
We inspect the wall, measure the elevations, and explain the cost drivers, including flashing, trim transitions, scaffolding, and finish selection. The final figure depends on the actual assembly and site conditions.
Farmington Siding and Windows Pro handles stucco siding fitting near me in Farmington, including wall preparation, drainage details, finish application, and cleanup. Call (860) 744-9803 to discuss your home and arrange a site review. We look at existing siding, windows, and areas where cracking or water entry may signal a deeper issue. You can also ask about transitions if your exterior combines stucco with wood or other cladding.
A small, straightforward section often takes three to seven working days, while a full exterior can take two to four weeks, including curing intervals. Wall repairs, scaffolding, rain, and temperatures below the product's application range can extend the schedule. We explain the sequence before work begins and keep you updated as each layer is completed. Curing is part of the installation, not avoidable downtime.
Inspect stucco twice a year and after severe storms, focusing on cracks, sealant, flashing, and areas around windows. Rinse surface dirt with a garden hose; avoid aggressive power washing that can damage the finish or drive water into openings. Keep soil and plant growth from covering the bottom edge. If a crack widens, reappears, or is accompanied by damp interior materials, have the wall assessed rather than simply covering it.
Tell us what is happening with your exterior, from cracking to a planned renovation. Our team will review the wall, explain the installation sequence, and help you take the next step. Call Farmington Siding and Windows Pro at (860) 744-9803.
Call (860) 744-9803 or email [email protected] to describe the siding or window issue at your Farmington home. Our listed office hours are Monday through Friday, 8:00 a.m. to 6:00 p.m.; calls are routed to independent companies. Share the affected area, any visible damage, and whether water is entering so the conversation starts with useful details.