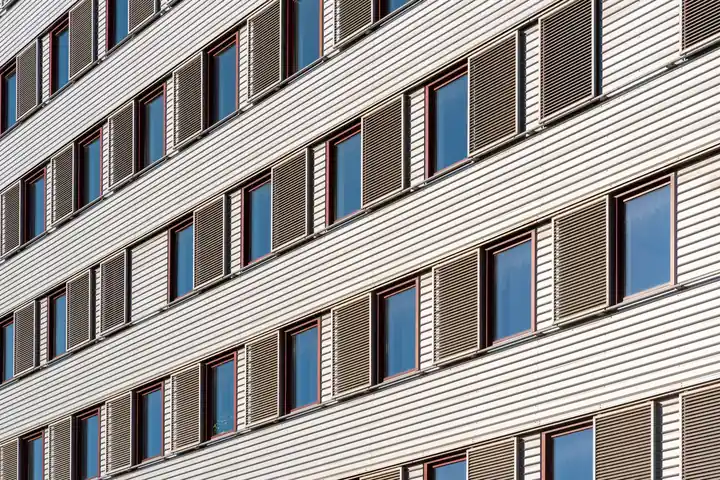
Vinyl Siding Installation in Farmington, Connecticut
Vinyl Siding Installation in Farmington, Connecticut gives homeowners a durable exterior finish and a practical way to address damaged, faded, or loose siding. We install carefully measured panels, trim, flashing, and house wrap, with attention to windows and moisture-prone details. If your home needs a complete exterior update or old panels no longer sit securely, our team explains the work and helps you choose a fitting system for your property.
Measured coursesWe check alignment across each wall.
Protected openingsWe detail around frames and trim.
Clear work areaWe organize tools and remove debris.
Final walkthroughWe review completed elevations with you.
What Vinyl Siding Installation Covers
A typical project includes exterior assessment, wall measurements, removal in the planned work areas, surface preparation, and installation of panels and matching accessories. We identify damaged sheathing and discuss the repair before covering it. Window replacement, major structural work, and unrelated exterior upgrades are separate tasks unless they are specifically part of your project plan.
Wall Assessment
We inspect existing panels, visible trim, wall openings, and roofline transitions. The review looks for cracks, loose sections, and signs of moisture. It helps us plan removal, panel layout, and any necessary substrate repair before new material is installed.
Removal and Preparation
We remove existing siding in the designated areas and prepare the wall for the new system. Where included, this covers house wrap and flashing details. If the exposed sheathing is damaged, we show you the affected area and explain the repair needed.
Panel and Trim Fitting
Installation covers starter strips, siding panels, corner details, and the agreed trim components. We cut and fit around windows, doors, and wall features, keeping panel courses aligned and allowing the movement required by the product instructions.
Opening Transitions
We pay close attention to window and door edges, where siding, flashing, and frames meet. Properly arranged transitions help direct water toward the exterior. Window glass or window replacement is not automatically part of siding work.
Completion Walkthrough
After installation, we check panel engagement, trim, clearances, and visible cuts. We remove work debris and review the finished elevations with you. You receive practical care guidance for cleaning and checking the exterior after seasonal weather.
Homes and businesses.
The approach is the same for a home and a business. What changes is the access, the schedule and who needs the paperwork.
For Homes
We help homeowners plan siding around windows, entries, and roof edges. You can review panel options and understand how wall preparation affects the finished exterior.
Faded or cracked exterior panels
Loose siding after strong winds
Window trim needing coordination
For Properties
We coordinate exterior work with owners and property managers around access, entrances, and building use. You receive a clear explanation of the installation sequence and affected elevations.
Worn panels on multiple elevations
Entry areas needing careful access
Trim transitions around storefront windows
Vinyl Siding Installation Farmington Homes Need
A plain-language look at what Vinyl Siding Installation involves and when it is needed.
Vinyl Siding Installation in Farmington, Connecticut is an exterior cladding service that covers and protects a home's walls with interlocking, weather-resistant panels. We inspect the existing surface, remove siding where required, check sheathing for damage, and install house wrap, flashing, starter strips, and trim before fitting the panels. Correct clearances around windows and doors matter: vinyl expands and contracts with temperature, so panels must not be nailed too tightly. We use a level, tape measure, utility knife, and siding nailer to keep courses straight and allow movement.
Farmington's freeze-thaw cycles, wind-driven rain, and humid summers put stress on older siding and exposed trim. Cracked panels, fading, water infiltration, and siding rot are reasons to assess the wall assembly rather than simply cover the visible damage. Our Farmington Connecticut vinyl siding installation work includes checking transitions at soffit, fascia, and window frames. If you are searching for affordable Vinyl Siding Installation in Farmington Connecticut, we first identify the actual repair needs so the proposed work addresses the cause, not just the surface.
The wall preparation and water-management details matter as much as the visible vinyl panels.
What it is
An exterior cladding system of fitted vinyl panels, trim, and supporting wall details.
When needed
When siding is broadly cracked, faded, loose, or no longer protects the wall reliably.
What to expect
Assessment, measurements, wall preparation, panel fitting, and a finished-work review.
How Installation Moves Forward
Vinyl siding installation contractor Farmington customers work with us through a practical sequence: assess, measure, prepare, fit, and inspect. We explain each stage before work starts, protect nearby areas, and keep access routes clear so you know what is happening at your home.
Walk-Through
Our installer walks the exterior with you and checks siding condition, wall transitions, window and door trim, soffit, fascia, and visible signs of water infiltration. We note loose siding panels, cracks, and areas that need closer inspection. This first visit usually takes 45 to 90 minutes, depending on the home's size and access.
Walk-through
Check condition
Discuss needs
Measure and Plan
We measure wall lengths, heights, openings, corners, and gable sections with a tape measure, then calculate panel and trim needs. You review profile, color, and accessory choices before materials are ordered. We also identify access needs; a two-story elevation may require scaffolding and a safety harness rather than ladder-only work.
Measure walls
Plan materials
Review access
Prepare the Walls
The crew removes existing siding in the agreed work areas and checks the exposed wall for damaged sheathing. We repair or replace affected substrate as planned, then install house wrap and flashing where needed. A circular saw, utility knife, and window pry bar help with controlled removal and accurate fitting around openings.
Remove siding
Prepare surface
Check flashing
Fit Panels and Trim
We install starter strips, corner posts, and window and door trim before setting the panels from the bottom upward. A siding nailer secures each course while leaving the required movement allowance; vinyl must not be pinned tight. We check alignment frequently with a level and keep cut edges clean around fixtures and roof lines.
Fit panels
Align courses
Finish trim
Final Inspection
We inspect panel engagement, fastening, trim joints, drainage clearances, and transitions around windows and doors. Our team removes installation debris and walks the finished elevations with you, pointing out care instructions and any follow-up items. A typical straightforward home project takes several working days; size, repairs, and weather affect the schedule.
Inspect details
Clear debris
Review work
Tools and Installation Methods
Move across a circle, or focus it and press Enter, for an illustrative thermal view of the photograph.
Siding nailer
We use a siding nailer to fasten panels consistently while preserving the movement allowance required by the product. Correct fastening helps panels stay engaged without being locked rigidly against seasonal expansion.
Circular saw
A circular saw makes controlled cuts for larger panel sections and trim components. We select a suitable blade and support the material to keep edges clean and measurements accurate.
Tape measure and level
We use a tape measure to lay out openings, corners, and wall lengths, then check courses with a level. Frequent checks help keep long elevations visually straight.
Caulking gun
A caulking gun applies compatible sealant at designated joints and trim details. We use caulk where the system calls for it, without blocking drainage paths that need to remain open.
Scaffolding and safety harness
For elevated sections, scaffolding provides a stable work platform and a safety harness supports safe access where conditions require it. We plan access before removing panels from upper walls.
Thermal views are illustrative, generated from the photographs.
Methods
Drainage-plane preparation
We prepare the wall so water that gets behind the siding can drain outward. House wrap is installed with correctly arranged overlaps, while flashing directs water around openings and transitions. Before covering the wall, we check that the details work together rather than creating a pocket that holds moisture.
Bottom-up panel layout
We set the starter strip level, then install panels upward with each course engaging the one below. Measurements at corners, windows, and gables guide cuts and seam placement. We verify alignment as we go, because a small error at the base becomes more visible across a tall wall.
Movement-aware fastening
Vinyl changes dimension with temperature, so panels need the fastening clearance specified by the manufacturer. We avoid driving fasteners so tightly that a panel cannot move, and we check engagement after fastening. This reduces buckling risk and helps the finished courses remain aligned.
Opening-first detailing
We inspect window and door transitions before panel installation and coordinate flashing, trim, and siding edges. This approach lets the exterior layers direct water outward. It also helps prevent gaps or improvised cuts around window frames after the main wall is already finished.
When to Replace Your Siding
Faded elevations
Several elevations show cracking and fading after repeated Farmington freeze-thaw seasons.
We inspect panel condition across each wall, check corners and openings, and determine whether damage is limited or widespread. If replacement is the practical route, we measure the elevations, review colors and accessories, and prepare the wall layers before fitting new vinyl panels.
Outcome: You get a consistent exterior finish, with damaged wall areas addressed rather than concealed behind new material.
Historic details
A Farmington Historic District home needs an exterior update that respects its window and trim layout.
We map window frames, door trim, corners, and changes in wall plane before selecting panel layout. Our team discusses finish options and details that suit the home's existing character, then carefully coordinates flashing and trim around openings during installation.
Outcome: The updated cladding follows the home's proportions and leaves cleaner transitions around the features that define its exterior.
Entry moisture
Loose panels and water marks appear near a rear entry after wind-driven rain.
We inspect the panels, entry trim, and visible flashing to locate the likely route for water. After removing material in the affected area, we check the substrate and carry out the planned repair before fitting replacement panels and reviewing the drainage path.
Outcome: The entry wall receives a repaired, properly fitted finish, with the underlying concern identified before the surface is closed.
Window coordination
An exterior renovation includes new windows and a full vinyl siding update.
We coordinate the work sequence so window installation, flashing, and siding trim meet cleanly. The team measures openings, protects the surrounding work area, and fits panels after the necessary window and wall preparation. This avoids finishing siding first and then disturbing it for window work.
Outcome: Your windows and siding share cleaner exterior transitions, and the project avoids unnecessary rework around the openings.
Farmington homes face wet spring weather, summer humidity, autumn leaf buildup, and winter freeze-thaw cycles. Those changes make secure panel engagement and open drainage paths important. We check shaded wall sections for persistent moisture, examine roof edges for runoff patterns, and look closely at window openings where older flashing may be worn.
In the Farmington Historic District, existing trim proportions and window placement influence panel layout; larger or taller elevations elsewhere may require scaffolding and staged access. Our professional vinyl siding fitting Farmington Connecticut service begins with measurements and a review of the visible wall condition.
For projects planned in November or winter, temperature and material handling matter: vinyl panels are more brittle in cold conditions, so we account for manufacturer guidance and weather before cutting or fastening. We follow applicable Connecticut requirements and product instructions, and we do not cover damaged sheathing without addressing the planned repair.
Farmington Historic District: Older window and trim layouts call for careful measurements and clean transitions. We plan panel breaks around existing architectural features rather than forcing a standard layout.
West Farmington: Open exposures can make loose panels and wind-driven rain more noticeable. We inspect corners, gable edges, and attachment details before fitting replacement material.
Farmington Woods: Tree shade and seasonal debris can keep some wall sections damp longer. We check lower courses, trim, and drainage paths where moisture tends to linger.
Downtown Farmington: Compact access and varied building details can affect staging. We review walkways and openings before setting ladders or scaffolding and beginning removal.
Winter cold makes vinyl panels more brittle during handling and cutting.: We account for product guidance and site temperatures before cutting or fastening. Cold-weather work needs deliberate handling, and the work sequence may change to reduce the risk of cracking panels.
Wind-driven rain tests corners, openings, and lower wall transitions.: We inspect flashing and house wrap at windows and doors, then maintain clear drainage paths. Properly arranged layers help water move outward instead of collecting behind the cladding.
We walk the elevations and explain visible siding concerns.
We protect nearby paths and organize tools for the work area.
We review completed panels, trim, and care steps with you.
From problem to finished result.
IllustrativeThe thermal view is generated from the photograph. It is not a measurement. Drag the handle, or use the arrow keys once it is focused.
Faded Front Elevation Renewed
Before: The front wall had broad sun fading and several replacement panels that did not match. Two courses were loose near a corner, and the trim around one window had open joints. The owner wanted a more uniform finish but needed the wall checked before new panels covered the old surface.
After: We removed the affected siding, checked the substrate, and installed coordinated panels across the planned elevation. The two loose courses were replaced, window trim was renewed, and the wall was checked for level alignment. The completed face now has consistent color and no visibly mismatched repair patches.
Rinse the wall with a hose when dirt builds up and inspect corners after severe wind. Avoid directing high-pressure spray into panel seams or upward beneath the siding.
Entry Wall Moisture Detail Corrected
Before: After driving rain, the homeowner noticed a dark mark beside the rear entry and a panel that shifted slightly. The trim joint was open, and the wall had not been inspected beneath the siding. Covering it quickly could have left the moisture path unresolved.
After: We removed the siding around the entry, inspected the exposed area, and repaired the agreed damaged section. Flashing and trim transitions were addressed before new panels were fitted. The repaired area is about 8 feet wide, with aligned courses and a clear outward drainage path at the opening.
Check the entry trim each spring and after major storms. If caulk separates or panels shift, arrange an inspection before water marks spread to the interior.
Whole-Home Finish Unified
Before: Different sides of the house had faded at different rates, with older wood siding still visible on one elevation. The mix of colors and materials made the exterior look pieced together, and several window transitions needed attention.
After: We removed the planned cladding, inspected the walls, and installed vinyl panels across four elevations. The team coordinated trim around the windows and finished the soffit and fascia transitions. The homeowner now has one consistent exterior finish with updated details at openings and corners.
Wash the siding once or twice a year as needed, using a mild cleaner and soft brush. Keep plants and stored items clear of lower panels so the wall can dry.
Problems New Siding Can Address
New panels address widespread wear, but the wall behind them must also be sound and detailed to shed water. Our team checks the source of visible damage before deciding what to replace. If you are weighing vinyl siding installation cost Farmington Connecticut, identifying the true repair area helps keep the plan focused.
Cracked panelsCracked panels expose the wall to wind-driven rain.Water can reach house wrap, sheathing, and framing through damaged areas, especially when a crack sits near a corner or opening. We remove affected panels and inspect the layers beneath them. Our team repairs the planned substrate area, checks flashing and nearby seams, then installs replacement panels that engage properly with adjacent courses. If damage is widespread, we explain why a larger elevation replacement may provide a more consistent result.
Loose coursesLoose siding panels rattle and pull further from their courses.Repeated wind movement can loosen neighboring panels and leave gaps at corners, trim, or the bottom edge where water and debris collect. We inspect the attachment points, panel engagement, and wall edges to find why the siding moved. Where the existing material can remain, a repair may be appropriate; brittle or broadly loose panels often call for replacement. New vinyl installation follows the product's fastening and movement requirements.
Faded finishFaded siding makes elevations look uneven and patched.Sun exposure and older repairs can leave different walls with visibly inconsistent color, while brittle panels become harder to repair cleanly. We assess color variation, panel condition, and the extent of the affected elevations. If matching material is unavailable or the surface is failing broadly, we plan a coordinated replacement. You select a finish and accessories, and we lay out courses for a uniform appearance.
Moisture signsSiding rot near windows signals a possible moisture path.Soft trim or sheathing can worsen if new panels cover the area without fixing the water entry point. Window frames and flashing are common places to inspect. We remove the affected siding in the planned area and examine the exposed wall and opening details. Our team identifies damaged materials, corrects the agreed repair, and addresses flashing transitions before installing new panels. If window seal failure is also present, we explain the separate window issue.
Practical Benefits for Your Exterior
A prepared wall and carefully fitted panels create a cleaner, more weather-aware exterior.
Less Routine Upkeep
Vinyl does not require periodic repainting like many wood siding finishes. Wash the surface with a garden hose and a suitable cleaner as needed; avoid harsh pressure that can force water behind panels. Our team checks for faded siding and brittle sections before installation, then helps you understand simple seasonal care for the completed exterior.
Better Moisture Management
Panels are only one layer of a working wall. We pay close attention to house wrap laps, flashing at openings, and drainage details so rain has a path back out rather than into the sheathing. These steps matter around Farmington homes where snowmelt and repeated freeze-thaw conditions can expose weak seams.
A Consistent Finished Look
A new exterior can bring faded elevations and mismatched repairs into one clean finish. We plan panel direction, corner details, and trim around doors and windows before fastening begins. For a large wall, careful layout keeps short pieces and visible seams from landing in distracting locations.
A Clear Repair Baseline
Removing old panels gives us a chance to see the wall beneath them. If we find soft sheathing or water damage, we identify the affected area before covering it. That makes a new vinyl siding fitting Farmington project more than a cosmetic change: you get a sound surface and a clear record of work completed.
What a written scope covers.
What a written scope covers and what shapes it. Prices are set by the business after the first look.
The vinyl siding installation cost Farmington Connecticut homeowners pay also changes with trim details, access, and damaged sheathing. Small partial installations cost less than a complete exterior replacement. We inspect the elevations and explain the main cost drivers so you can compare like-for-like work.
Farmington Siding and Windows Pro provides vinyl siding fitting near me Farmington homeowners can discuss by calling (860) 744-9803. We review the existing exterior, measure the walls, and explain panel, trim, and preparation needs. For a useful comparison, ask any installer how they handle house wrap, flashing, window transitions, and concealed rot. Those details affect how the finished wall manages water.
A straightforward full-home installation often takes about 5 to 10 working days; larger homes, repairs, and weather can extend the schedule. A small elevation or partial replacement may take 1 to 3 days. We plan around material delivery, wall preparation, and safe access, then keep you informed as the crew moves from removal to panel fitting and final inspection.
Yes, quality vinyl siding suits Farmington's changing seasons when it is installed with proper fastening, flashing, and drainage details. Panels need room to expand and contract as temperatures change, and the wall assembly must direct water outward. We inspect vulnerable areas around windows, corners, and roof intersections, then follow the product instructions for clearances and attachment.
Loose, cracked, or faded siding deserves a proper look before moisture reaches the wall. Call (860) 744-9803 to talk through your exterior and arrange a project visit.
Call (860) 744-9803 or email [email protected] to describe the siding or window issue at your Farmington home. Our listed office hours are Monday through Friday, 8:00 a.m. to 6:00 p.m.; calls are routed to independent companies. Share the affected area, any visible damage, and whether water is entering so the conversation starts with useful details.