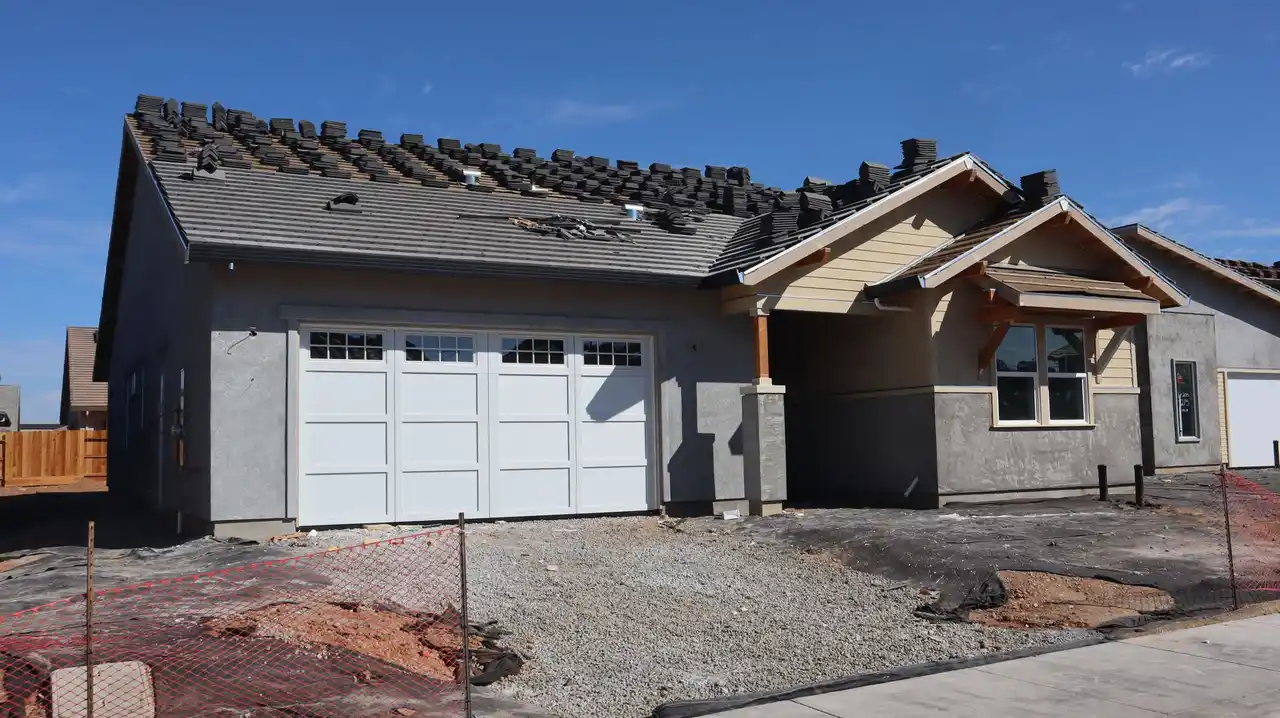
Siding Trim Installation in Farmington, Connecticut
Siding Trim Installation in Farmington, Connecticut gives your home a finished edge while helping shield seams, windows, doors, and corners from water. We help Farmington homeowners address peeling trim, siding rot, loose panels, and gaps after a siding or window project. Our team measures each opening, checks the existing substrate, and fits trim to the siding material so the exterior looks consistent and sheds rain properly.
Measure twiceWe check each cut against the opening.
Protect surfacesWe cover nearby glass and siding.
Check drainageWe keep intended paths open.
Review togetherWe show you the finished joints.
What Siding Trim Installation Includes
Our service covers the trim work needed to finish selected siding edges, openings, and corners. We inspect accessible backing and visible flashing, remove designated failed pieces, fit compatible replacement material, fasten it, and seal joints that call for sealant. Widespread sheathing repairs, window replacement, and unrelated siding work are separate tasks that we explain if they appear during inspection.
Opening and edge check
We inspect the affected windows, doors, corners, and siding terminations for gaps, loose pieces, staining, or soft trim. This check helps identify whether the repair is limited to the visible material or connects to flashing and backing that also need attention.
Careful removal
We remove the failed trim while protecting nearby siding and window glass. The exposed area is checked for moisture and sound fastening surfaces before replacement material goes on, so new trim does not conceal an unresolved problem.
Material and profile fit
We select a compatible trim profile, measure each run, and make square cuts for clean corners and consistent reveals. The fitting detail accounts for the existing siding system and the opening's dimensions.
Fastening and sealing
We fasten trim securely and apply exterior caulk only to joints intended to be sealed. Drainage paths and product clearances remain open where required, helping the wall shed water instead of trapping it.
Finish review
We check alignment, fasteners, sealant, and adjacent siding after installation. You can review the completed work with us and see which sections were repaired, along with any nearby issue that merits separate attention.
Homes and businesses.
The approach is the same for a home and a business. What changes is the access, the schedule and who needs the paperwork.
At Home
We check window, door, and corner trim while protecting nearby siding and glass. You can point out drafts, staining, or loose edges before work begins.
Soft trim beneath a window
Open joints around an entry door
Loose corner boards after wind
At Work
We coordinate access around entrances, tenant movement, and visible storefront edges. Property managers can identify affected elevations and review the completed transitions with us.
Trim gaps beside storefront windows
Damaged corner boards on offices
Exterior joints at building entries
Siding Trim Installation in Farmington, Connecticut
A plain-language look at what Siding Trim Installation involves and when it is needed.
Siding Trim Installation in Farmington, Connecticut is exterior finish carpentry that frames siding edges and protects transitions around windows, doors, corners, soffits, and fascia. We remove failed sections where needed, inspect the surface beneath, and install compatible trim with deliberate joints and clearances. A tape measure and level help keep reveals even; a circular saw and utility knife make clean cuts. We then fasten the pieces and seal appropriate joints with exterior caulk, preserving drainage paths rather than sealing every gap shut.
Farmington homes face freeze-thaw cycles, wind-driven rain, and seasonal moisture that can expose weak trim joints. If you see cracking near a window, soft wood at a corner, or water staining below a roofline, our team checks the surrounding siding and house wrap before fitting replacement trim. We handle siding trim fitting Farmington property owners need after window work, isolated damage, or exterior updates. For an affordable Siding Trim Installation in Farmington Connecticut, the key is correcting the cause of failure instead of covering it.
Trim should finish the siding edge while directing water away from openings and wall joints.
What it is
Fitting exterior trim at siding edges, corners, windows, and doors.
When needed
When trim cracks, separates, rots, or leaves an opening unfinished.
What to expect
Inspection, measured fitting, fastening, joint review, and cleanup.
How the Work Proceeds
Siding Trim Installation in Farmington follows a practical sequence: inspect the joint, confirm the material, remove failed pieces, fit replacements, and test the finished transitions. We explain what we find as the work moves forward, so you know which areas are being addressed and why.
Inspect and measure
We start with a walk-around of the affected wall, checking trim joints, siding edges, window frames, and visible flashing. A tape measure and level establish lengths, reveal widths, and alignment points. This visit usually takes 30 to 60 minutes for a focused repair area, and you can point out drafts, staining, or loose panels you've noticed.
Walk-around
Measure
Check joints
Confirm materials
Our team identifies the existing trim and siding, then checks the profile, thickness, and fastening surface before ordering or cutting replacement pieces. James Hardie, CertainTeed, LP SmartSide, and Mastic products each have distinct details. We explain the match and joint approach in plain language, including where caulk belongs and where a drainage gap must remain.
Match profile
Check material
Plan details
Prepare the wall
We protect nearby glass and landscaping, remove the damaged trim carefully, and inspect the exposed area for moisture or soft backing. A window pry bar helps limit damage to adjacent siding; a utility knife clears old sealant. If house wrap or flashing is compromised, we address that transition as part of the repair rather than covering it.
Protect area
Remove trim
Inspect backing
Fit and fasten trim
We cut replacement pieces square, align the reveal, and fasten them with a siding nailer or appropriate hand tool. A caulking gun applies sealant only at joints intended to be sealed. A small window or corner repair often takes two to four hours; larger elevations require more time for removal, fitting, and careful cleanup.
Cut pieces
Fasten trim
Seal joints
Check the finish
Before packing up, we inspect the trim line from multiple angles, check fasteners and sealant, and confirm that water can drain where the assembly requires it. We remove debris and review the completed area with you. You leave knowing what was replaced, what remains sound, and whether another siding or window issue needs attention.
Review finish
Clear debris
Explain findings
Tools and Fitting Methods
Move across a circle, or focus it and press Enter, for an illustrative thermal view of the photograph.
Tape measure and level
We measure each trim run and check alignment across openings and corners. This keeps reveals consistent and helps prevent sloped or uneven casing.
Circular saw
We use controlled cuts for straight trim lengths and accurate miters. The blade and setup suit the material being fitted, with dust control appropriate to the work.
Siding nailer
The siding nailer fastens compatible trim and siding components without unnecessary surface damage. We follow the material's fastening requirements and keep fasteners correctly positioned.
Caulking gun
We apply exterior caulk to joints designed for sealant, maintaining a controlled bead. Correct placement seals the detail without blocking drainage paths.
Window pry bar
This tool helps remove old casing and trim with control around the window frame. Careful leverage reduces damage to surrounding siding and the exposed opening.
Thermal views are illustrative, generated from the photographs.
Methods
Ladder and scaffolding
We select access equipment for the height and work area, secure the setup, and use a safety harness when site conditions call for it.
Layered water-management check
Before installing trim, we inspect the visible relationship among siding, flashing, and house wrap. We identify the direction water should drain and avoid sealing an intentional exit path. Where the opening exposes damaged flashing or backing, we correct that transition before covering it with new trim.
Material-matched installation
We match trim and fastening details to the siding system and follow relevant manufacturer instructions. Vinyl needs movement room, while fiber cement and engineered wood have distinct clearance and edge details. The fit, joint treatment, and fastener placement all support the specific material rather than a generic assembly.
Controlled removal and replacement
We cut or release failed trim in manageable sections, protect adjacent surfaces, and inspect the exposed substrate. Replacement pieces are measured, cut, aligned, and fastened before sealant is applied where appropriate. This sequence helps preserve sound siding and keeps the repair focused.
Safe elevated access
For upper windows and roofline trim, we assess footing, reach, and ground conditions before choosing a ladder or scaffolding. We secure the work area and use fall protection when conditions require it. Safe access keeps measurements and fastening controlled at height.
When Trim Work Makes Sense
Window trim
A Farmington homeowner spots peeling paint and soft trim below an upstairs window after winter.
We inspect the casing, nearby siding, and visible flashing from safe access. After identifying whether the decay is limited to trim, we remove the damaged section, check the backing, and fit a compatible replacement. We keep the opening protected during the work and review the water-shedding details with you.
Outcome: The window gets a straight, secure surround, and the source of the visible deterioration is addressed rather than covered.
Historic profile
A renovation in the Farmington Historic District needs replacement trim that respects an older facade.
We measure the existing profile and compare the reveal, thickness, and corner detail before cutting new material. Our team protects adjacent siding and checks how the trim meets the window frame. We work to retain the home's visual lines while correcting failed joints and water exposure.
Outcome: The repaired section fits the character of the facade and closes exposed transitions without creating a conspicuous change.
Corner repair
A Farmington Woods home has loose siding and a cracked corner board after repeated freeze-thaw cycles.
We check the corner from top to bottom, identify loose fasteners, and look for moisture behind the board. We reset or replace affected components, confirm that siding courses meet the trim correctly, and preserve the required movement clearance. If the damage extends beyond the corner, we explain the connected repair.
Outcome: The corner is aligned and secure, with the adjacent siding edge fitted to the replacement trim.
Window upgrade
A window replacement in West Farmington leaves an exposed frame edge and uneven casing.
We verify the frame depth, inspect the perimeter flashing, and measure all sides of the opening. Then we fit casing that covers the transition while maintaining the window's operation and the siding system's drainage. We finish with a joint check and remove the installation debris.
Outcome: The new window has a complete exterior surround with even reveals and a coordinated connection to the siding.
Siding Trim Installation in Farmington must account for wet autumn weather, winter freeze-thaw cycles, and spring rain that expose weak joints. We schedule material handling around product requirements and check that sealants are suitable for the conditions on the day of work.
In older homes around the Farmington Historic District and Farmington Village, existing profiles and window depths can differ from newer construction, so we measure instead of assuming standard dimensions. Our siding trim installation contractor Farmington team inspects the wall layers and uses a detail suited to the cladding.
If you're looking for same-day siding trim installation Farmington, call with the repair location; we can discuss the issue and arrange the appropriate visit. Connecticut building requirements and manufacturer instructions guide the work, while the specific assembly determines the fitting detail.
Farmington Historic District: Older facades can have distinctive casing widths and corner profiles. We measure existing details carefully and inspect for hidden wood deterioration before matching replacement trim.
Farmington Village: Homes with varied window ages may have mixed frame depths. We check each opening so new casing meets the frame and siding without leaving uneven reveals.
Farmington Woods: Tree cover and seasonal shade can leave exterior joints damp longer. We inspect trim edges and nearby siding for soft spots before deciding whether sealant or replacement is needed.
West Farmington: Wind-driven rain can test exposed corners and window transitions. We trace staining to the joint and verify flashing before closing the assembly.
Freeze-thaw cycles open weak joints and stress aging sealant: We check for separated caulk, cracked trim, and movement at siding edges. Sealant application follows product temperature guidance; if conditions fall outside it, we plan the work to avoid a poor bond.
Older window openings vary in depth and profile: We measure each opening rather than cutting all casing to a single assumed size. This accounts for frame projections, uneven walls, and trim details that differ from newer construction.
We walk the affected wall and explain the trim and siding conditions.
We protect nearby surfaces and set up the needed access equipment.
We review the finished joints, remove debris, and discuss next steps.
From problem to finished result.
IllustrativeThe thermal view is generated from the photograph. It is not a measurement. Drag the handle, or use the arrow keys once it is focused.
Window Casing Water Damage
Before: A Farmington homeowner had peeling paint and soft trim at the lower corners of two windows. The casing had pulled away from the siding, and a dark stain showed beneath one joint. The windows still operated, but the opening's exterior edge was no longer tight or visually even.
After: We removed the affected casing, checked the backing and flashing, and fitted new trim around both openings. Each side was measured for a consistent reveal, and the repaired joints were sealed where appropriate. The windows retained their operation, while the damaged perimeter became straight and complete.
Check window corners each spring for open joints, soft wood, or fresh staining. Keep gutters clear above the openings and address failed caulk before water reaches the trim backing.
Loose Exterior Corner Board
Before: At a Farmington Hills home, a corner board had loosened beside two siding runs. The lower section moved by hand, and the seam had opened enough to catch debris. The adjacent panels remained largely sound, but the corner no longer held a clean line.
After: We removed the loose board, inspected the fastening surface, and replaced the damaged section with a matching profile. The new piece was aligned over the full run and secured to solid backing. The corner line became straight, and the surrounding siding edges met the trim without a visible gap.
Look over corner boards after strong wind and during spring cleanup. Remove leaves trapped at the base, and call for an inspection if a board shifts or the siding edge starts to separate.
Mismatched Post-Window Trim
Before: After a window upgrade in West Farmington, the new frame was sound but the old exterior trim did not cover the transition evenly. One side projected farther than the other, leaving an inconsistent appearance against the existing siding.
After: We measured the frame depth and the surrounding siding, then fitted replacement casing on all four sides. The reveal was checked with a level, and sealant was applied only at the intended joints. The new trim gave the opening a uniform border without interfering with window operation.
Wash the casing gently and inspect the perimeter during routine exterior checks. Avoid directing high-pressure water at the trim joints, and report new gaps or drafts near the frame.
Problems Siding Trim Installation Solves
Damaged trim creates more than a cosmetic problem when gaps guide water toward the wall. We address the source and fit the replacement to the surrounding exterior.
Window seamSeparated trim leaves an open seam beside a windowRain can reach the frame or wall cavity, leaving stains indoors and weakening nearby wood if the opening remains exposed. We remove loose casing, inspect the window perimeter and flashing, and check for soft backing. Then we fit compatible trim with a consistent reveal and seal the designated joints. If the frame itself shows damage, we explain the related window repair needed rather than hiding it behind new casing.
Rotten cornerRotting corner boards crumble beside otherwise sound sidingSoft trim loses its hold on fasteners and can allow water behind adjacent siding, spreading repair needs along the corner. We trace the corner from the roofline downward, remove unsound material, and inspect the substrate. Replacement boards are cut to match the existing profile and fastened to solid backing. We also check the nearby siding edge and flashing so the new corner has a functioning water-shedding transition.
Failed caulkOld caulk cracks and pulls away from exterior trimA split seal can expose end grain and wall joints to repeated wetting, especially during wind-driven rain and winter thaw periods. We remove failed caulk, check whether the joint is designed to be sealed, and inspect for water infiltration. Where trim remains sound, we prepare and reseal the appropriate joint. If the gap results from a warped or incorrectly fitted piece, we replace or refit the trim instead of adding another bead.
Unfinished casingNew windows leave mismatched or incomplete exterior casingAn unfinished perimeter can look inconsistent and leave exposed transitions around the frame, even when the window unit works properly. We measure the frame depth and surrounding siding, then select trim that completes the opening without blocking operation or drainage. Our team checks flashing and house wrap where accessible and fits the casing to align with nearby windows. You get a finished exterior detail that complements the replacement unit.
What Proper Trim Delivers
Sound trim finishes edges and helps keep water away from vulnerable joints.
Water-shedding transitions
Trim at windows, doors, and corners helps direct rain away from joints instead of toward exposed edges. We inspect flashing and the surrounding siding before closing the assembly. That matters when a small gap has already left staining or dampness indoors; the fix should address the water path, not simply hide the mark.
Consistent exterior lines
A measured reveal keeps trim from looking uneven beside siding courses or window frames. We use a level and tape measure to align each run, then check the sightline from several points in the yard. Small corrections during fitting prevent a crooked corner board from drawing attention across an otherwise sound facade.
Material-compatible finish
Vinyl siding, fiber cement siding, and wood siding each call for compatible trim and installation details. We check product dimensions and movement requirements before cutting, then select fastening and joint treatment for the assembly. The result is a transition designed to work with the siding instead of fighting its expansion or surface.
Earlier damage control
Replacing damaged trim before moisture reaches sheathing can limit the repair area. We probe suspect edges and inspect for siding rot, soft substrate, or a failed seal around window frames. If the damage is localized, a focused repair can avoid disturbing a larger wall section while restoring a sound exterior joint.
What a written scope covers.
What a written scope covers and what shapes it. Prices are set by the business after the first look.
Typical 2026 pricing in Farmington depends on trim material, access, removal, and any damaged backing or flashing. We inspect the affected wall and explain the cost before work starts. The phrase siding trim installation cost Farmington Connecticut covers a wide range because replacing one corner board is very different from reframing several windows.
Farmington Siding and Windows Pro handles local trim installation and repair around siding, windows, doors, soffits, and fascia. Call (860) 744-9803 to describe the location and what you see, such as cracking, soft wood, or a gap near a window. We inspect the affected transition, identify compatible materials, and explain the repair. For Farmington homeowners, the right installer should check the water-management layers before covering a damaged joint.
A small trim repair usually takes two to four hours, while a full elevation or several window openings can take one to three working days. Removal, hidden moisture damage, material matching, and safe access change the schedule. We measure first and explain the work sequence. Cold weather also affects sealant selection and handling, so we use product instructions and suitable conditions rather than rushing a joint.
For example, fiber cement siding needs trim and fastening details designed for that assembly, while vinyl systems require room for movement. We compare available profiles and explain how each meets the window or corner detail. Existing wood trim can still be appropriate when it is sound and maintained; damaged sections should be checked for rot before replacement.
Stop water from working behind loose or cracked trim. Our Connecticut Home Improvement Contractor team will inspect the joint, explain the repair, and provide upfront pricing. Call (860) 744-9803 to arrange a Farmington visit.
Call (860) 744-9803 or email [email protected] to describe the siding or window issue at your Farmington home. Our listed office hours are Monday through Friday, 8:00 a.m. to 6:00 p.m.; calls are routed to independent companies. Share the affected area, any visible damage, and whether water is entering so the conversation starts with useful details.